Webhooks
Webhooks in UnoPim let you push real-time product update notifications to an external URL whenever product data changes. Instead of polling the API, your connected systems (e-commerce storefronts, ERPs, marketplaces) receive an HTTP request the moment a product is created, updated, or deleted.
The Webhook Settings page is located at Configuration >> Webhooks in the admin sidebar.
General Tab
The General tab is where you enable the webhook and configure the destination URL. It uses a two-panel layout.
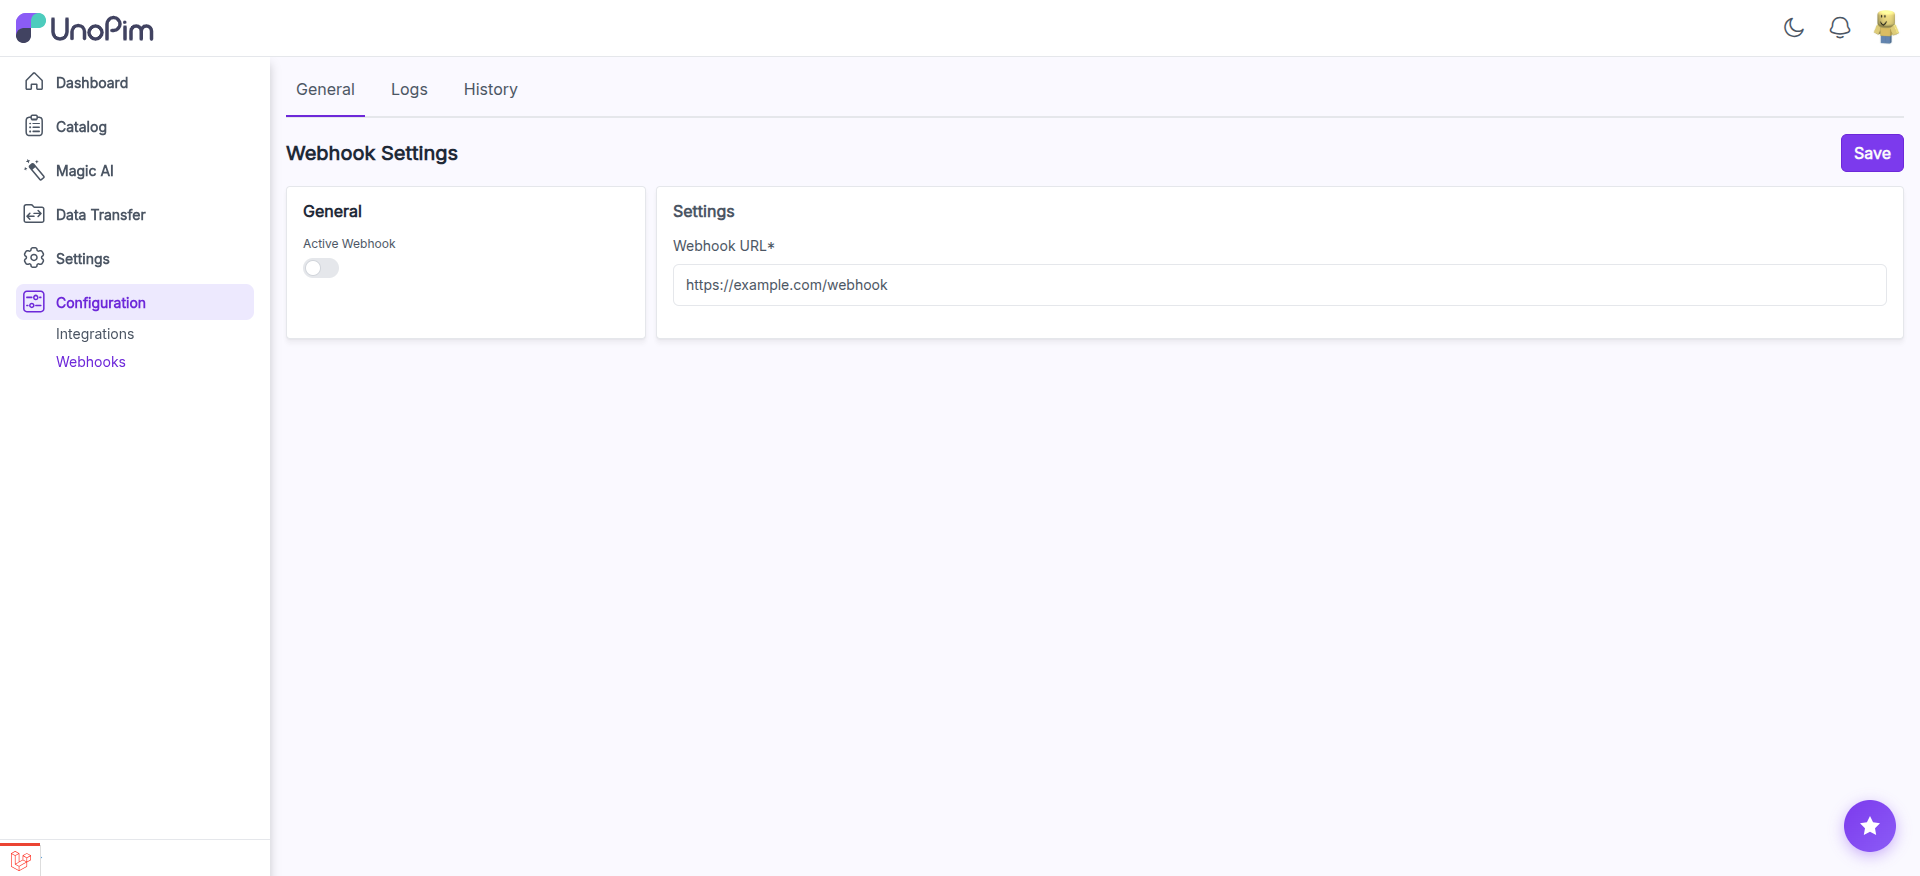
Enable the Webhook and Set the URL
Step 1: Navigate to Configuration >> Webhooks in the admin sidebar. The General tab is selected by default.
Step 2: In the General panel on the left, toggle Active Webhook to enable webhook delivery.
Step 3: In the Settings panel on the right, enter your Webhook URL (e.g., https://example.com/webhook). This is the endpoint that will receive POST requests whenever product data changes.
Step 4: Click the Save button at the top-right of the page to apply your configuration.
TIP
Use a service like webhook.site during development to inspect the payloads UnoPim sends before building your processing logic.
Logs Tab
The Logs tab displays a record of every webhook request that UnoPim has sent. Use it to monitor delivery status and troubleshoot failures.
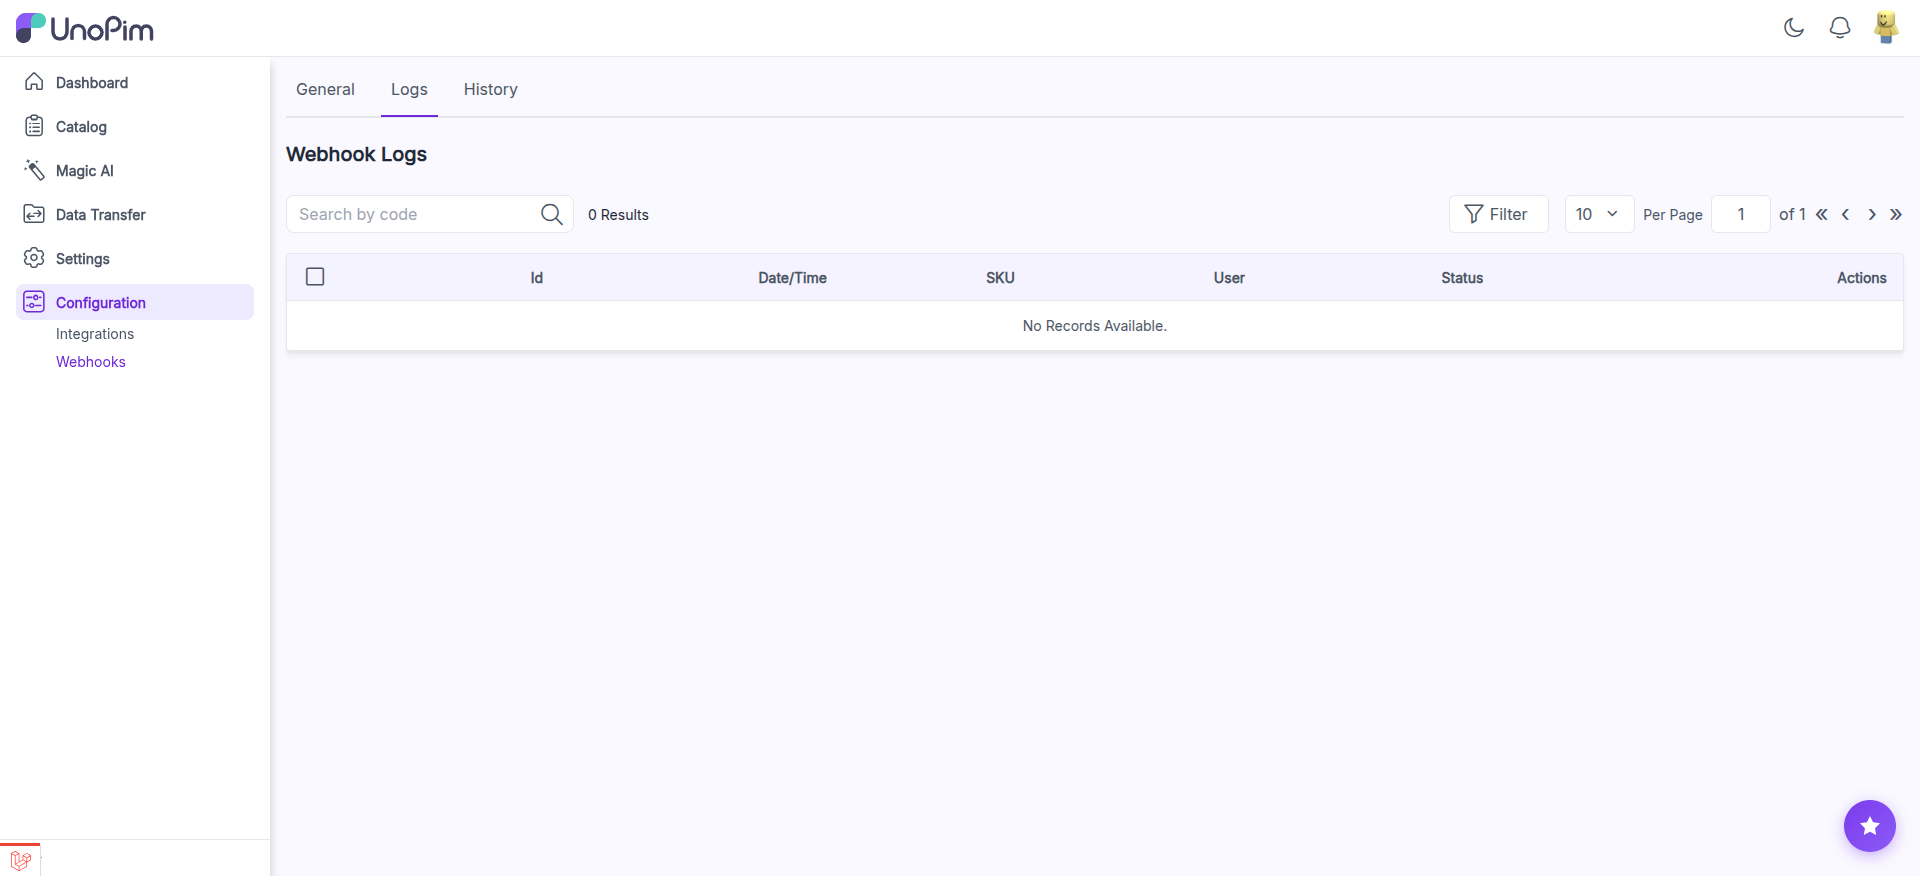
The log datagrid includes the following columns:
| Column | Description |
|---|---|
| Id | Unique identifier for the log entry |
| Date/Time | When the webhook request was sent |
| SKU | The product SKU that triggered the webhook |
| User | The admin user whose action triggered the change |
| Status | The HTTP response status code returned by your endpoint |
| Actions | View details of the individual log entry |
You can use the search bar to search by code, the Filter button to narrow results, and the pagination controls to browse through entries.
TIP
If you see non-200 status codes in the logs, check that your endpoint is reachable, returns a 200 OK response, and can handle the incoming JSON payload correctly.
History Tab
The History tab tracks every change made to the webhook configuration itself. Use it to audit when settings were modified and by whom.
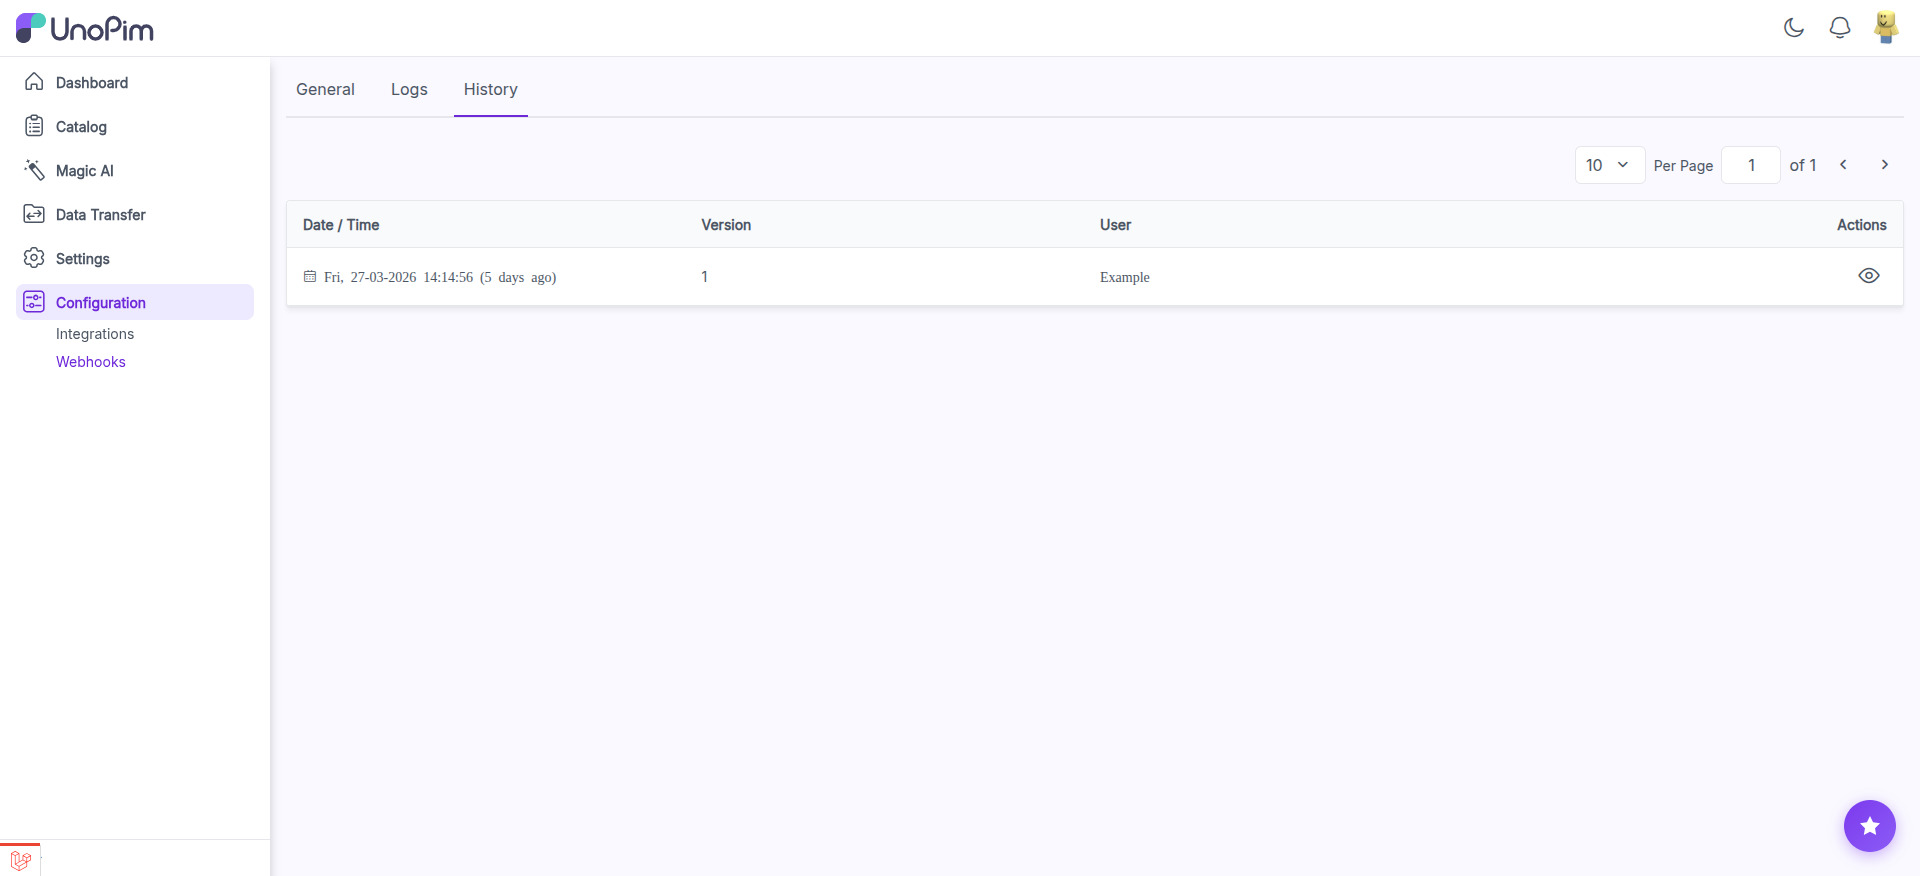
The history datagrid includes the following columns:
| Column | Description |
|---|---|
| Date/Time | When the configuration change was made |
| Version | The version number of the configuration snapshot |
| User | The admin user who made the change |
| Actions | Click the eye icon to view the full details of what changed |
This is useful for tracking when the webhook URL was updated, when the webhook was enabled or disabled, and which user made the change.
Quick Setup Summary
- Go to Configuration >> Webhooks.
- On the General tab, toggle Active Webhook on.
- Enter your Webhook URL in the Settings panel.
- Click Save.
- Switch to the Logs tab to monitor outgoing webhook deliveries and verify successful responses.
- Switch to the History tab to review any past configuration changes.
TIP
If your receiving endpoint is temporarily down, toggle the Active Webhook off to pause deliveries. Your configuration is preserved and you can re-enable it at any time without re-entering the URL.