Simple Product
Dark / Light Theme
UnoPim supports a Dark / Light Theme toggle. Click the sun/moon icon in the top-right corner of the header bar (next to the notification bell) to switch between light and dark mode. Your preference is saved and persists across sessions.
A simple product is the most basic and common product type. It's a physical, unique, standalone product without any other variations.
Simple products offer customizable options within a single SKU.
This is the step-by-step tutorial on how to add a simple product in UnoPim.
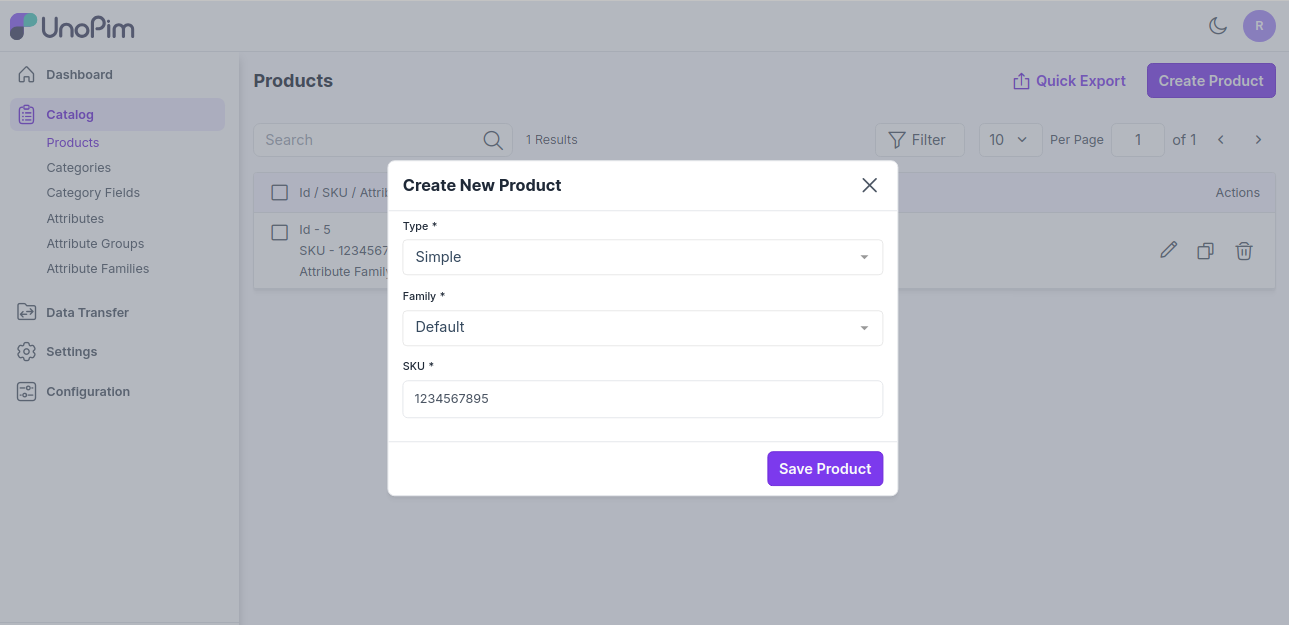
To Create Simple Product in UnoPim
- Click on Catalog >> Products >> select product type Simple,Family and enter SKU.
Now Save the Product, and you will get redirected to the Edit product page as shown below.
General Attributes
It displays the attributes assigned in the product's family grouped by attribute group.
The below given are required attributes present in the "default" family
Enter SKU of the product
Enter Name of the product.
Now enter the URL Key of the product.
Short Description
Enter a short description of the features of the product.
Description
Mention your product in detail.
Price
Insert the price and cost price of the product as shown in the below image
Technical
Now Enable the product from the status option as shown below.
Categories
You can also assign the product into the root category as shown in the below image.
Associations
Also, you can add the Related Products, Upsell Products, and Cross Sell Products.
1) Related Products - Related products are products that are similar to a selected product.
You can display potential substitutes help to them discover other similar products they might like.
To add Related Products click on Add in the Related Products section and search the product through the SKU which you want to add as a Related Product as shown in the image below.
Now click on Add Selected Product button.
2) Up-Sell Products - Upselling is the practice of selling a higher-end version of an item they're interested in.
For instance, an electronics retailer pointing out the benefits of a better TV, a faster laptop, or a more durable tablet would be an example of upselling.
To add Up-Sell Products click on add in the Up-Sell Products section and search the product through the SKU which you want to add as a Up-Sell Product.
Now click on Add Selected Product button.
3) Cross-Sell Products - Cross-sells are products that you promote, based on the current product. They are typically complementary items.
For example, if you are selling a laptop, cross-sells might be protective case stickers or a special adapter.
To add Cross-Sell Products click on add in the Cross-Sell Products section and search the product through SKU which you want to add as a Cross-Sell Product.
Now click on Add Selected Product button.
You can also add as many products as per your requirements.
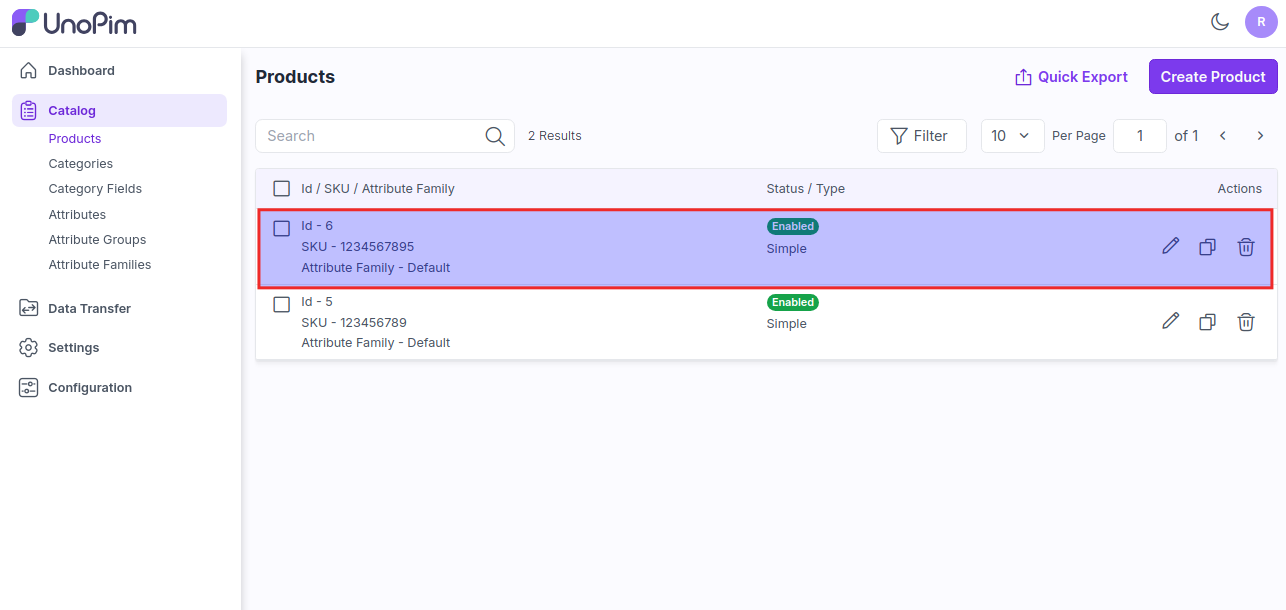
At last, Save the Product.
Now the product is created successfully and it will be visible in Products Data Grid as shown in the below image.
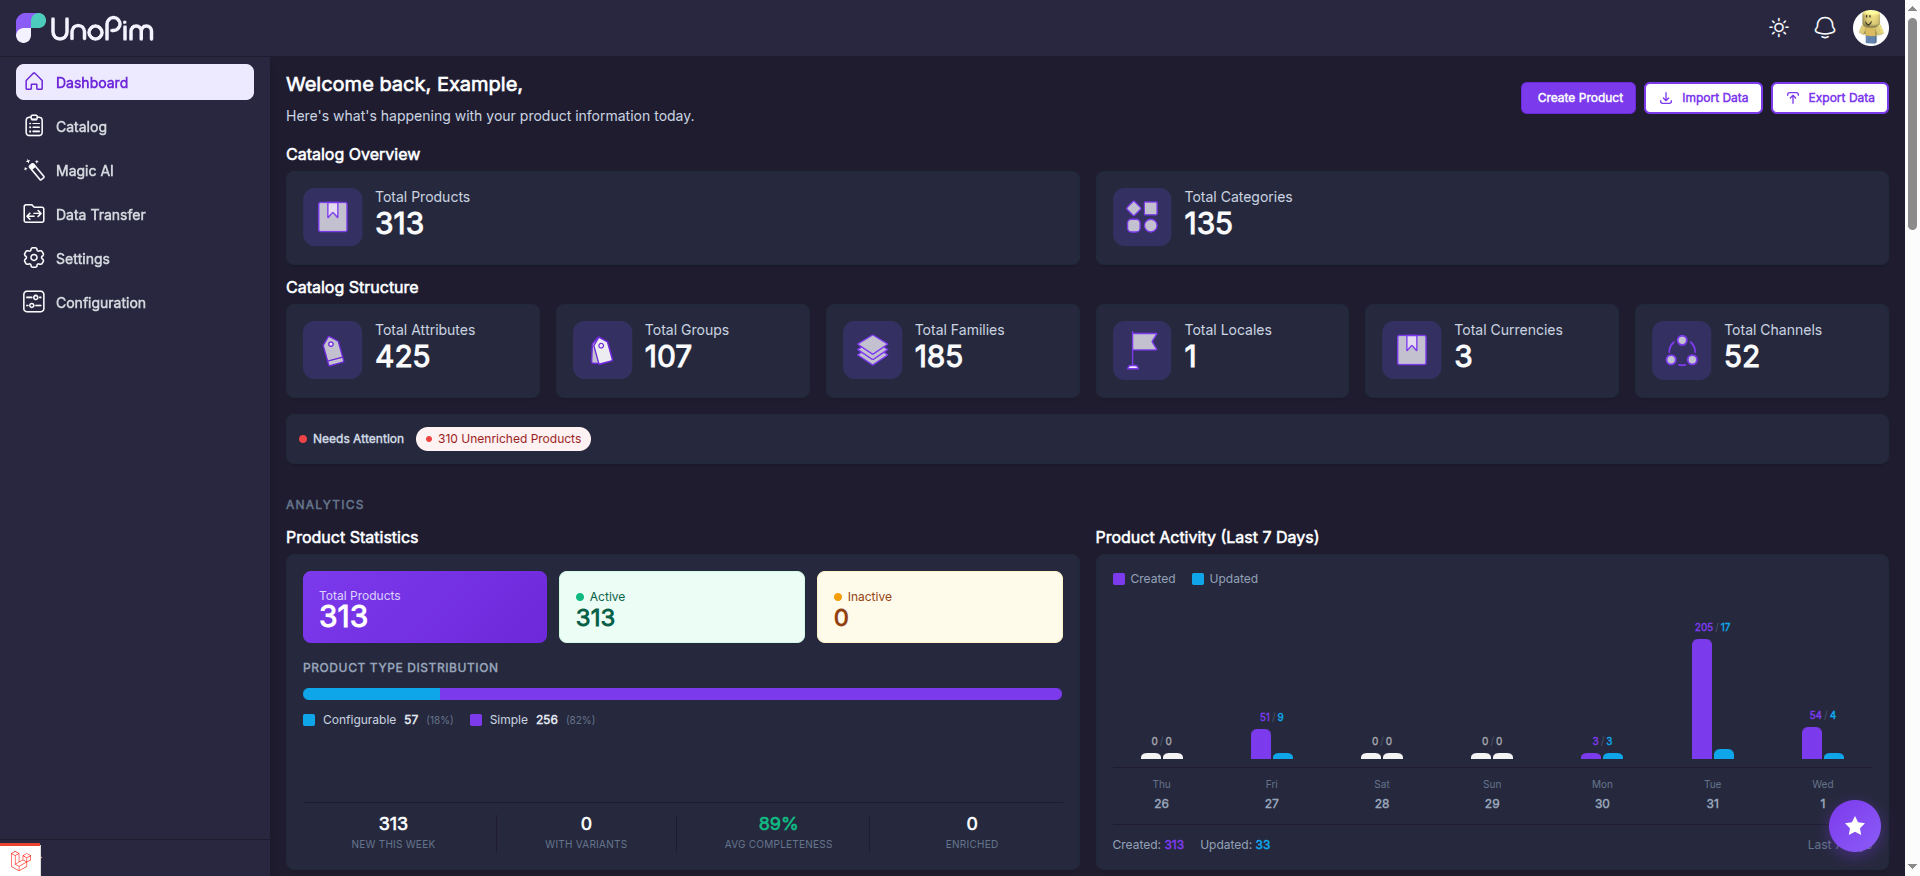
Product Completeness
UnoPim v2.0 includes a Product Completeness system that provides quality scoring for your products. The completeness score indicates how much of the required product information has been filled in.
- Each channel has its own completeness calculation
- Completeness is shown as a percentage (e.g., 89%)
- Products with low completeness display the message "Low completeness, add details to improve"
- Products that are nearly complete show "Almost complete, just a few details left"
The completeness score is visible on the Dashboard and helps you identify products that need more information.
TIP
You can use the completeness system together with the AI Auto-Enrichment feature to automatically fill in missing product fields and improve your completeness score.
Product Bulk Edit
UnoPim supports Bulk Edit capabilities that allow you to edit multiple products at once. This is especially useful when you need to update a common attribute across many products.
To use bulk edit:
- Navigate to Catalog >> Products
- Select the products you want to edit using the checkboxes
- Click on the Bulk Actions dropdown
- Select Edit and choose the attribute you want to update
- Enter the new value and apply the changes
Bulk Enable / Disable Products
- Select multiple products using the checkboxes
- A bulk action bar appears at the top
- Choose Enable or Disable to change the status of all selected products at once
Bulk Delete Products
- Select the products you want to remove
- Click the Delete bulk action
- Confirm the deletion — this permanently removes the selected products
Product Values Translation
The Product Values Translation feature allows you to translate product attribute values across all configured locales.
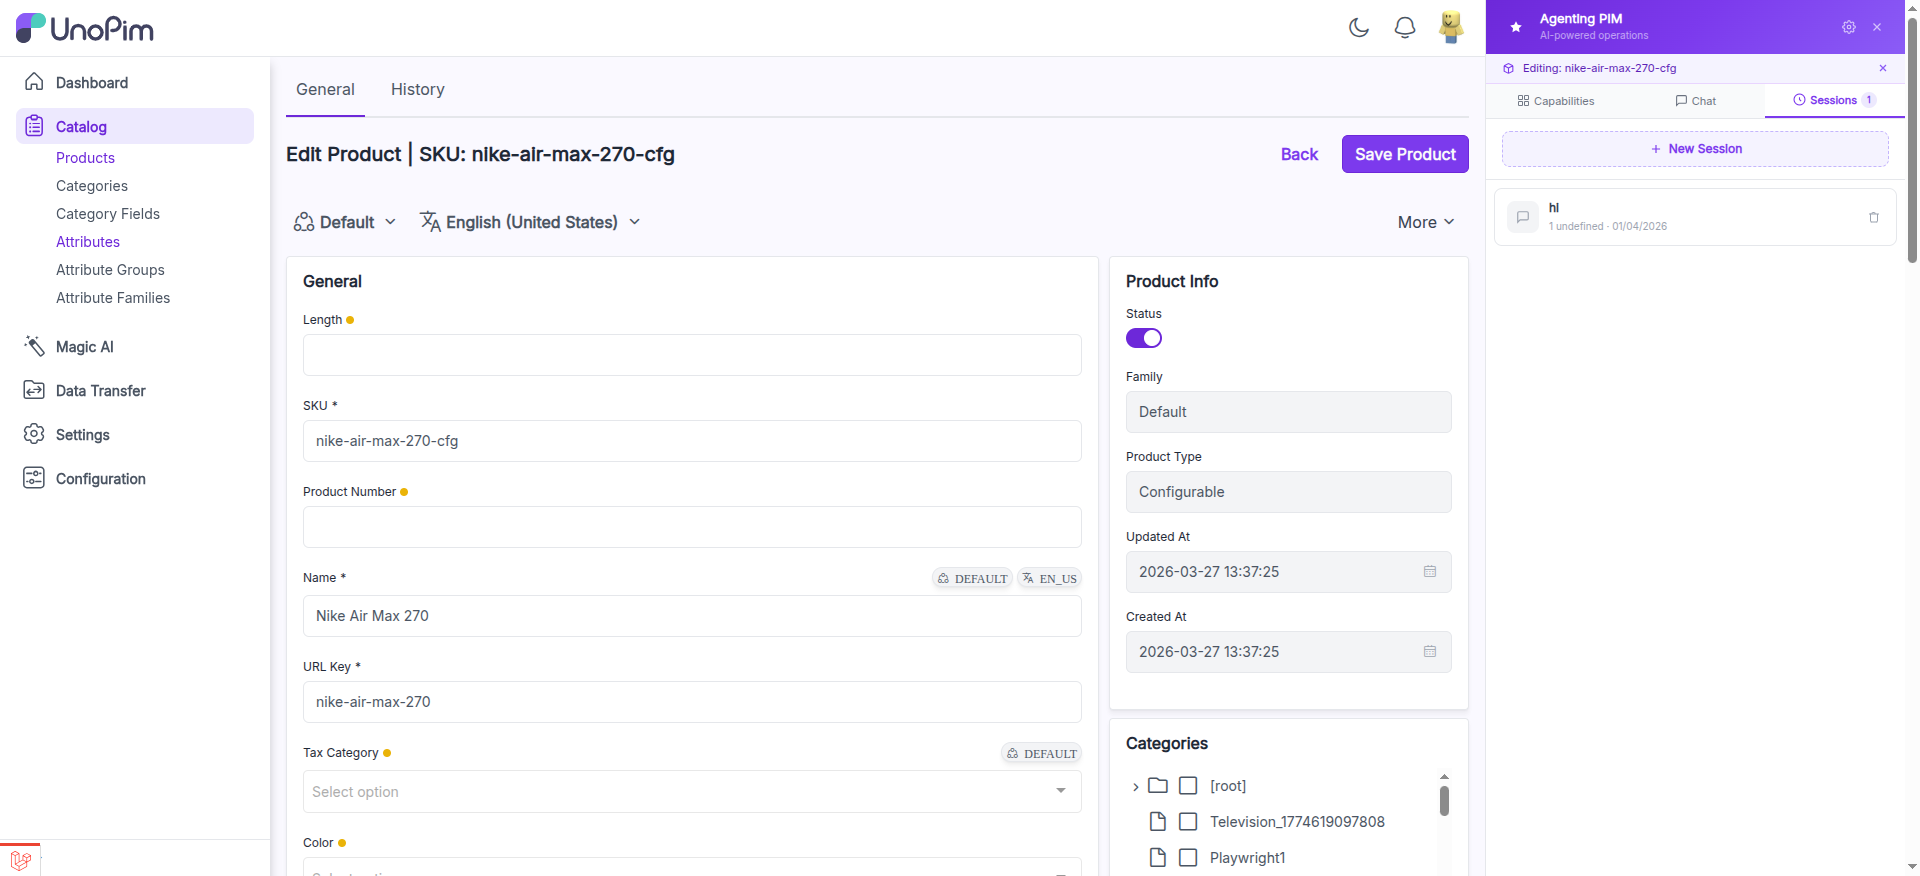
How to Translate Product Values Manually
- Navigate to Catalog >> Products and click Edit on the product you want to translate.
- At the top of the edit page, you will see two dropdowns:
- Channel Switcher (e.g., "Default") — Select the channel whose values you want to edit.
- Locale Switcher (e.g., "English (United States)") — Select the locale you want to enter translations for.
- Switch to the target locale (e.g., French, German, Hindi).
- The form reloads with the attribute values for that locale. Fields that support per-locale values display a locale badge (e.g.,
EN_US). - Enter the translated values for each field (Name, Description, URL Key, etc.).
- Click Save Product to store the translations.
- Repeat for each locale you want to translate.
TIP
Attributes showing a DEFAULT badge are channel-specific. Attributes showing a locale badge (e.g., EN_US) are locale-specific. Attributes with both badges support values per channel AND per locale.
Auto-Translation with Magic AI
Instead of translating manually, you can enable Auto-Translation in Magic AI >> Settings >> Translation:
- Enable the Translation toggle
- Set the Source Channel and Source Locale (the language you write in, e.g., English)
- Set the Target Channel and Target Locales (the languages to translate to)
- Choose a Translation Model (you can pick a faster/cheaper provider for translations)
- Optionally toggle Replace Existing Value to overwrite previous translations
Once enabled, when you create or update a product, UnoPim automatically translates all locale-specific fields to the target locales using AI.
Dynamic Datagrid Columns and Filters
The Products Data Grid supports dynamic columns and filters. You can customize which columns are visible in your product listing and apply advanced filters to find specific products quickly.
Product History
You can view the product history by navigating to Catalog >> Products >> Edit Product and clicking on History.
Afterwards, in the Actions you can view the product history details.
Quick Export
You can quickly export your data in CSV, XLS, or XLSX formats directly from the product listing.
- Select the products you want to export
- Click on the Quick Export button
- Choose your preferred format
- The export file will be downloaded
Copy Product
You can quickly duplicate a product using the Copy action:
- Navigate to Catalog >> Products
- Find the product you want to copy in the datagrid
- Click the Copy icon (clipboard icon) in the Actions column for that product
- A new product is created as a duplicate with a new SKU
- You can then edit the copied product to customize it
Product Datagrid Columns
The product datagrid supports dynamic column management. Click the Columns button above the datagrid to open the "Manage columns" modal.
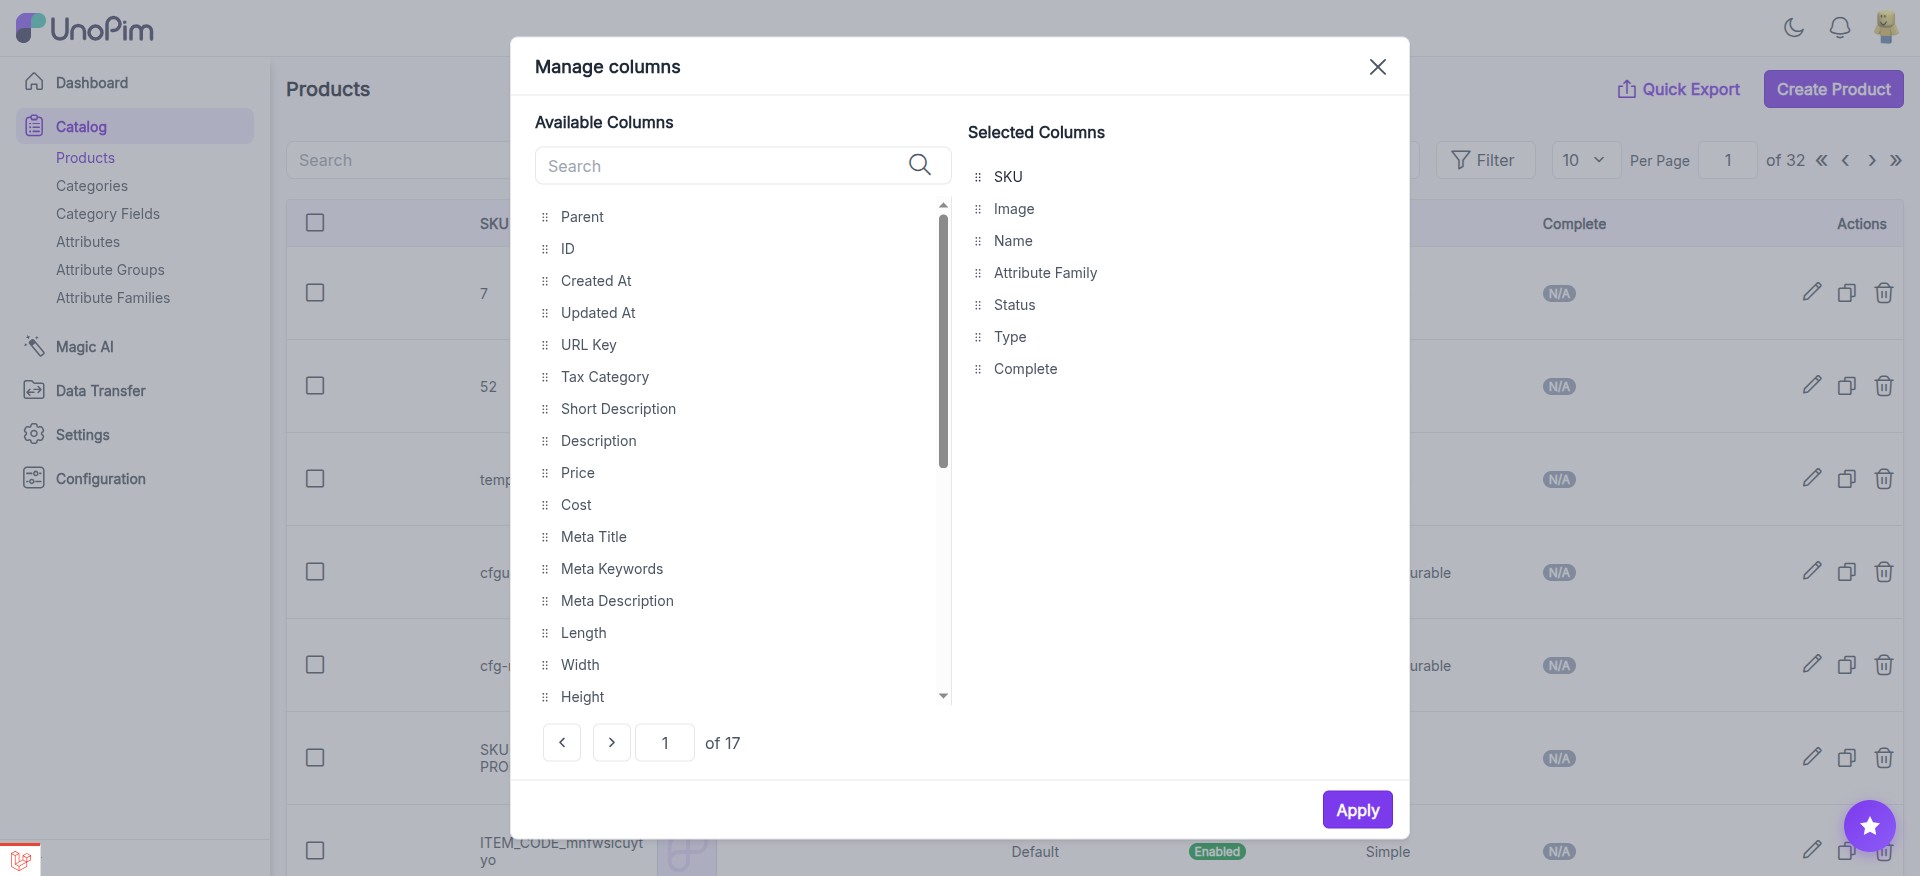
The modal shows two panels:
- Available Columns (left) — Lists all product attributes that can be added as columns (Parent, ID, Created At, Updated At, URL Key, Tax Category, Short Description, Description, Price, Cost, Meta Title, Meta Keywords, Meta Description, and all custom attributes). Paginated with search.
- Selected Columns (right) — Shows the currently visible columns. Default: SKU, Image, Name, Attribute Family, Status, Type, Complete.
To customize:
- Drag columns from Available to Selected to add them
- Drag columns within Selected to reorder them
- Remove columns from Selected to hide them
- Click Apply to save your column configuration
Product Filters
Click the Filter button above the datagrid to expand the filter panel. You can filter products by:
- SKU, Name, Type (Simple/Configurable), Status (Enabled/Disabled), Attribute Family
- Any visible column can be used as a filter
- Filters support text search, dropdown selection, and date ranges
- Multiple filters can be combined for precise results
- Click Apply Filters to apply, or clear individual filters to reset
History
UnoPim tracks a complete audit history for all major entities — not just products. Navigate to any entity's edit page and click on the History tab to view:
- Products — Track all changes to product attributes, status, categories, associations
- Categories — View history of category name, description, and field changes
- Attributes — Track when attributes were created, modified, or configuration changed
- Attribute Families — View when attributes were added or removed from families
- Channels — Track channel configuration changes
Each history entry shows: the date/time of the change, the user who made it, and the specific fields that were modified with before/after values. You can click the View action (eye icon) to see the full details of each change.
Note: Attributes that support values per channel will display a channel badge, while attributes that support values per locale will display a locale badge. If an attribute supports both values per channel and values per locale, it will display both badges.